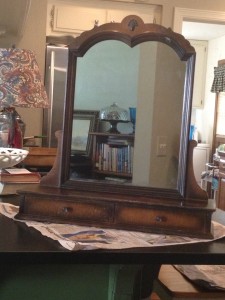
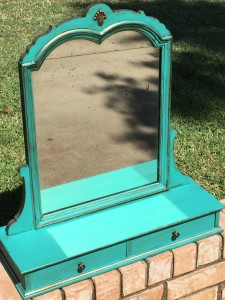
I loved this vintage tabletop mirror the moment I saw it.
It was tucked away, high on a shelf in a vintage store. No one was looking at it.
I pulled it down and was surprised at its weight. Heavier than it looked, it was dirty and water-stained. I could tell it had good bones, every corner was tight and the mirror was in great shape. I knew it would be a wonderful DIY project so I took it home with me.
Then I forgot about it…FOR A WHOLE YEAR. It literally sat in my unfinished (remodel in progress) dining room, on the floor and out of sight.
One weekend, five weeks into the fractured elbow/sprained ankle debacle, I realized that I was going stir crazy. (I can’t walk far and I only have use of one arm. I also am not allowed to lift anything with the left arm. My activities are pretty limited.) It was then that I had the idea of painting that mirror.
I had Larry carry it to the kitchen counter. There, I could sit on a barstool and paint to my heart’s content.
In May, I had purchased a small jar of Mason Blanche chalk paint. I had never used that type of paint or heard of that brand, but I loved the color and knew I wanted to experiment.
I am used to latex paint and am a “thin-coater,” someone who will do multiple super thin coats instead of a couple of thick ones. I like the way the thin coats allow the texture of the wood to show through. However, I quickly discovered that chalk paint does not like to be laid down thin. It was streaky and rough and kind of yucky.
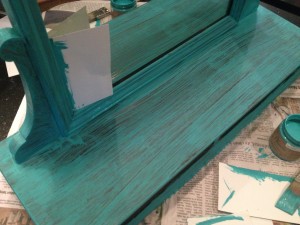
Not pretty at all!!! YUK!
So I let it dry and applied a generous coat the next time. It was so much better, nearly perfect. I ended up doing one thin and two thick coats. I could have left off the first thin one – I just didn’t know.
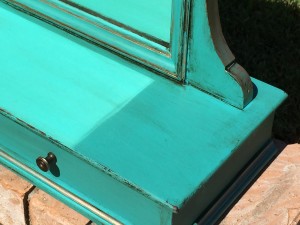
It looked good. But oh my, that color nearly knocked my socks off. It was BRIGHT! And it needed some definition. Not really sure what I wanted to do, I grabbed a jar of metallic paint and an eyeliner brush and started outlining the piece in Warm Metallic Silver (a soft gold). I also added it to the top and side pieces.
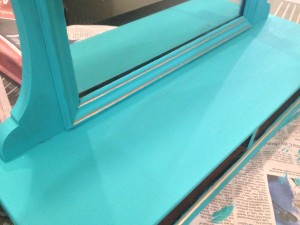
So bright!
After that, I made a mess. Seriously. A big one.
I was applying a medium brown wax to give the color some depth and tone it down a shade, but I applied it too thick and the wax dried almost instantly. (I have no idea if this is normal with chalk paint.) It was dark and streaky and ugly and would not wipe off at all. I thought I had ruined it and would need to sand the entire thing and start over. (Made me sort of sick.)
Instead…I grabbed Goo-Gone. (I keep a bottle under my kitchen sink to remove stubborn labels on my vintage finds.) It was just an idea…the wax was gooey and needed to come off. Goo-Gone takes off goo. It seemed logical.
I sprayed it directly on the piece and the wax came up, partially. So I sprayed and wiped and sprayed and wiped until I got the amount up that I wanted.
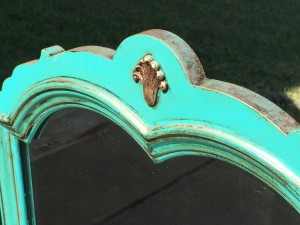
Then I took a paper napkin (I know…I could never teach anyone how to do this because I do it by the seat of my pants, grab this, grab that, and hope it works. I’m fairly sure you are not supposed to use paper napkins) and began to layer on thin layers of wax. I used a light touch and a quick wipe off action and SURPRISE…it worked.
I then painted a thin stripe of Warm Silver around the original drawer pulls and added a small dot in the center. Just a bit of shine on an otherwise matte hunk of metal.
When it was all said and done…I LIKED IT! In fact, I liked it so much I want to keep it — but probably won’t. (Truth is — I want to keep everything — I’m going to have to join Hoarders Anonymous soon.)
WOW! Beautiful & so impressive!! What a great tutorial of how to try & try again… Or just have you do it!!! 🙂 Thanks for the blog!!!!
Beautiful!